I watched that video and learned about Gstretch and the option to create a curve based on an annotation.
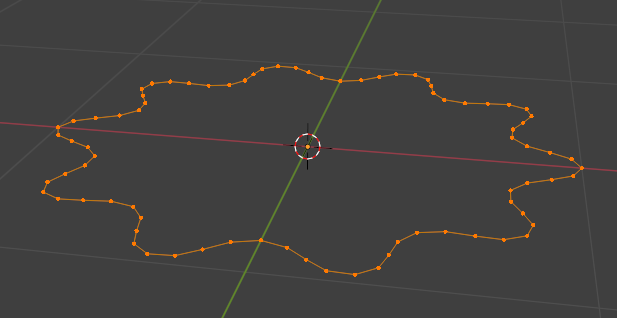
To practice and experiment, I decided to create the outline of the cup using Gstretch. I took a screenshot of the overall shape of the cup that the instructor achieved in the early steps of the tutorial:
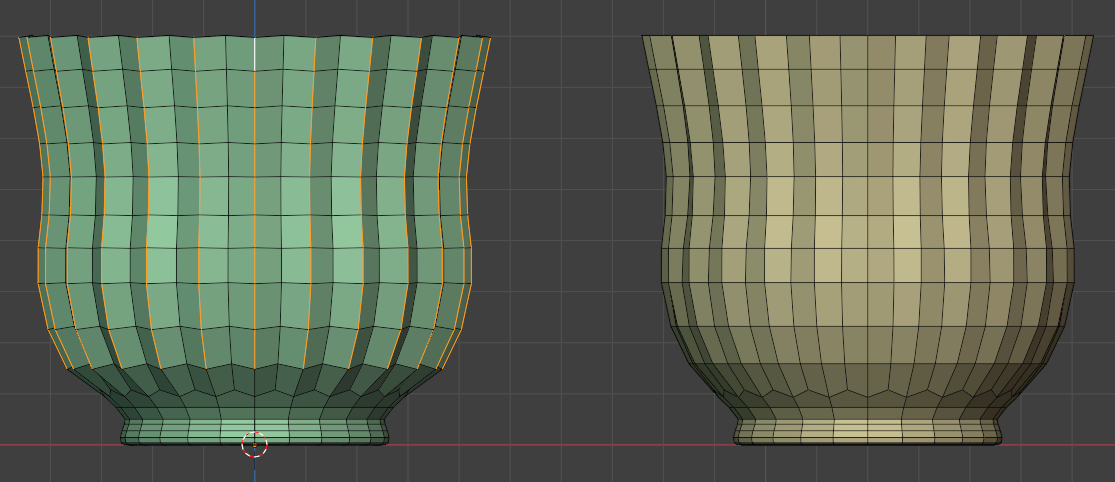
From what I’ve learned so far, faces should be squares so that a texture would sit on the shape perfectly (right?), this shape that I’ve created has rectangular faces… I think I should have increased the number of iterations in the array modifier… but without applying the array modifier I couldn’t bridge the edge loops (or could I?!).
So how do I square the faces? Is there a tool for it? Adding loops makes the situation more complicated.
Not a lot… Until you get to one direction being 3 or more times longer.
The whole idea of keeping it nice and square is for animating mesh. If you have a character doing a twist with their upper body you will see lots of distortion (of the texture) in the twisted area. Then the difference between square faces and taller faces becomes very apparent. The more square, the less stretch is visible.
With a cup you can take out every second horizontal loop, or 2 out of three - and save on the vertex count. Honestly - until you are more knowledgeable about topology you will be adding a subdivision surface to smooth everything. So it is fine to have less horizontal loops.
Yes. Exactly that. Then as @Dworkin said - add a loop on top and use Loop Tools > Circle to turn it into a circle.
This also covers the transition at the base. Remember you can do a Loop Tool > Circle, then set the influence slider to half…
It would be nice to have a rectangle for modeling work, but it doesn’t have to be a rectangle, and it’s not possible to maintain a rectangle for all modeling.
You can avoid bunching up the edges by simply shortening the edges you don’t need.
※ These things are not absolutely necessary, and you don’t need to be overly obsessed with them.
You can decide depending on the purpose of use or situation.
For example, what if you need a handle when making a cup?
The square edges will be convenient for attaching handles to.
However, it doesn’t matter if it’s a cup without a handle.
I couldn’t go into detail about every single click, but I redid the model, keeping the main steps.
It is probably not as refined as the one John Dickinson made.
I also like this curve that you managed to achieve. Curves in 2D programs for some reason tend to be easier for me to manipulate and understand, but in Blender they are a bit confusing, at least for a beginner like me, with all the different handle types and number of verts/resolution.
But how did you add extra vertical loops to the cup in step #2? Offset Edge Slide on every second vertical loop?
I tried selecting every second vert and ‘gg’ to slide them up, but some of the verts on the sides don’t slide to the correct direction. How did you slide them up?
The fusion step is also another challenge for me. If I join the handle and cup after applying the mirror modifier and removing the SubD modifier, and then Bridge Edge Loops, it creates a total mess. I also tried with a union boolean, but it causes Z-fighting for unknown reasons to me.
You can use the Shrink/Flatten tool to create the ribs (I simply used Scale on X and Y axis) but you need to combine it with the Proportional Editing tool to gradually reduce the effect towards the bottom of the cup.
Unfortunately, you have to hide all the other points so that they are not affected.
You can also find your own method for doing this. There are several possibilities.
After using Grid Fill, keep the selection and use Smooth Vertices to relax the geometry.
I used a Boolean operation to fuse the handle and the cup.
But don’t expect to get the final result right after doing it.
You’ll need to do some cleanup and massage the geometry.